Preparation
Like most things it all starts with a bit of preparation, we'll run through what to think about first:
Make your own pizza base: freshly made pizza dough once cooked has a taste, texture & experience that no store bought substitutes even come close too (at least in our experience). We don't have any secret recipe from Grandma to share with the world except that we've found the Nadia Lim 'Basic Pizza Dough' recipe to work wonderfully, you can see that here: https://nadialim.com/basic-pizza-dough/ its simple, easy & works a treat.
Prepare your toppings: Spend a few minutes planning what pizza to cook & what its going to have on it. If you don't have any ideas a quick google search often helps, and if you really can't come up with anything, just go free style! Pizza is great like that, just about anything goes!
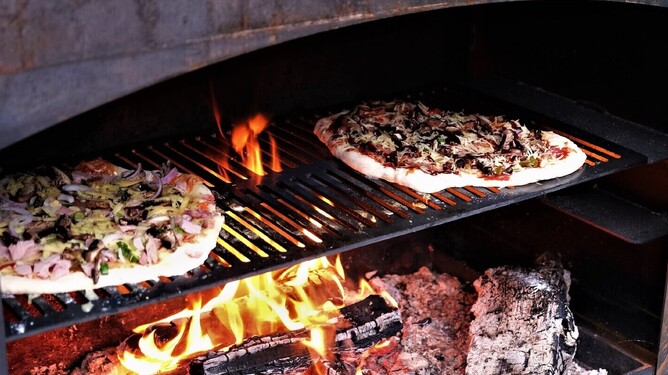
Prepare a base of coals: So its time to put match to timber! Your going to need a good base of hot coals to cook your pizza, so about 1 hour ahead of cook time get the fire going & keep stoking (be sure not to over stoke) to build up a bed of hot coals. Once that's done insert the cooking tray into the upper most holder of the fire (as seen in the picture above).
Note: Your fire can get up to some pretty hot temperatures, so make sure to use thick heat mitts to protect your hands and arms.
During the cook
So you've made the bases, put the toppings on and now your ready to cook, so here is what you do:
Spread the coals & make sure the cooking rack is in on the upper level (wait 5 minutes to let the steel heat up)
Slide your pizza's onto the cooking rack, ideally no more than x2 at a time
Shuffle coals to vary heat concentration, keep an eye on the pizza's look for the cheese to melt while keeping an eye on the base (you don't want to leave them on so long they burn). The cut out slots of the cooking tray make it easy to see how the base is doing from underneath.
Rotate the pizza's during the cook if required to ensure even cooking
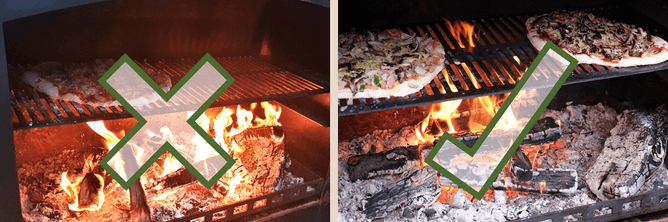
Re-stoke the coals, eventually the coals will begin to die down & lose heat (depending on what type of wood your burning will determine how soon that is). We recommend having kindling size timber on hand to keep the coals stoked with. However do this carefully, too much and you will have too many flames (as seen on the left hand image below) which will cause the base to burn before the rest of the pizza is ready. One or two pieces at a time to keep a few flames going is all you need (like the right image below) that provides enough radiant heat from the flames & keeps the coals re-charged ensuring you have near consistant heat output without providing too much direct flame heat.
Note: we recommend placing the timber at this stage in the center with the pizza's to the side.
Ready to Eat!
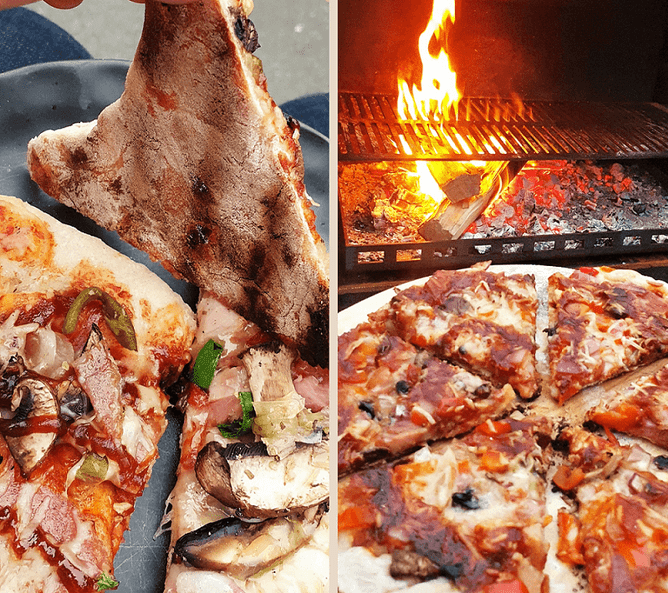
Once the topping is sufficiently cooked & the base is ready its time to remove the pizza from the cooking rack, cut it into slices & eat!
When optimally cooked the base will have 'puffs' appearing on the outer crust (like every good wood fired pizza!), the underside will begin to show some darked lines from the grill (but not be burnt) and the base overall will not be doughy but have a certain 'crunch' to it. Pictures below show the optimum cook.